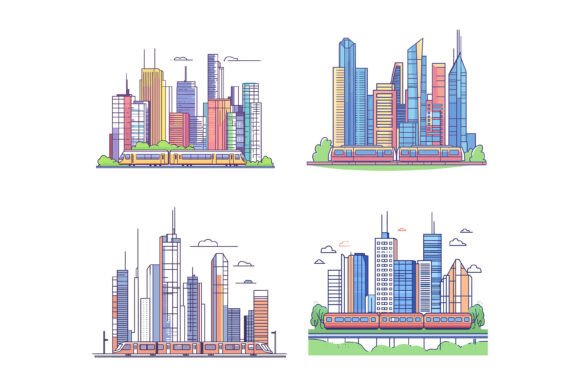
City Icons: Choosing and Using Vector Graphics the Right Way
City icons bring the energy of urban life into every project—from a real estate agent’s flyer to an app interface or a travel blog header. You probably landed here because you need crisp, professional skyline graphics or landmark symbols that won’t pixelate no matter how much you resize them. The good news is that a well‑prepared AI EPS collection, like the one you’re considering, can save hours of fiddling. But if you jump in without understanding a few fundamentals, you’ll end up with muddy colours, broken files, or visuals that look out of place.
Let’s walk through what a quality city icon set actually offers, where people often go wrong, and how you can turn those sharp vector illustrations into assets that work seamlessly across print, web, and mobile.
What Makes a City Icon Set Practical?
At its simplest, a city icon is a graphic that represents man‑made landmarks, infrastructure, or urban symbols—think skyscrapers, bridges, street maps, public transport, or even stylised street lamps. But the real value lies underneath the hood. A dedicated AI EPS collection typically delivers scalable vector artwork that you can edit, recolour, and combine without losing sharpness. When the files are neatly organised with proper naming, separated layers, and consistent styling, you’re not just buying pretty pictures. You’re buying back the time you’d otherwise spend cleaning up a messy download or rebuilding a graphic from scratch.
Many creators don’t realise that a well‑structured icon set includes more than just the native Adobe Illustrator (AI) and Encapsulated PostScript (EPS) files. Often a high‑resolution JPG preview is bundled in as well, which can be handy for quick mock‑ups. But that preview shouldn’t become your go‑to asset. More on that later.
Common Oversights That Waste Time and Quality
Even experienced designers occasionally trip over details that seem minor. Understanding a few key pitfalls can mean the difference between a polished, professional outcome and a frustrating round of do‑overs. These observations come from watching countless beginners and seasoned pros make similar, avoidable errors.
1. Using the Wrong File Format for the Task
AI and EPS are both vector formats, but they behave differently outside Adobe’s ecosystem. An EPS file often works like a universal container—it’s widely supported, but if you open it in a non‑vector programme and resave it, you might flatten the layers permanently. The native AI file preserves editability and layers in Illustrator, but it won’t open smoothly in every drawing app. People sometimes double‑click an EPS, see a rasterised preview, assume the quality is poor, and give up. Actually, the vector data is still pristine; you just need to place or open it correctly in a vector‑editing tool.
Better approach: Keep the AI file as your master copy. Use it within Adobe Illustrator for any serious editing or recolouring. Export from there to SVG for web, PNG for presentations, or PDF for print. If you’re working in Affinity Designer, CorelDRAW, or Canva, the EPS may be a smoother import path, but always test one icon first before building an entire project around it.
2. Ignoring the Layer Structure Until It’s Too Late
Many icon sets are labelled as “well‑organised,” but that can mean different things. Some bundle dozens of artboards; others place every shape on a single layer per icon. The real hidden advantage is when the illustrator has grouped elements and given them sensible names—for example, “Building outline,” “Windows,” “Shadow.” If you dive straight into recolouring without looking at the Layers panel, you might accidentally miss nested groups and end up with a half‑blue skyscraper and a half‑grey one. That leads to inconsistent branding and extra rework.
Correction: Spend five minutes exploring the file’s organisation before you start. Unlock all layers, expand groups, and note which parts are on separate layers. If the set includes global swatches or character styles, even better. That structure is what lets you change colours across an entire icon in seconds, rather than clicking piece by piece.
3. Forgetting That “Editable” Doesn’t Mean “Any Tool Works”
This is a subtle but common mistake. You read that you can modify colours and shapes easily, so you open the JPG preview in a raster editor like Photoshop or GIMP and start painting. The result will always look fuzzy, because you’re manipulating pixels, not vectors. Or you import the EPS into PowerPoint and wonder why the gradients aren’t rendering cleanly. Office software generally handles vector files in a simplified way, often dropping transparencies or converting strokes to basic objects.
The promise of “editable” is real, but it assumes you’re using a proper vector environment. If you need to tweak a skyline icon for a presentation, do the editing in Illustrator or a free alternative like Inkscape first, then export a clean PNG or EMF for your slides. That one extra step preserves the crisp look you expected.
4. Not Matching Icon Styles to the Overall Design
City icons come in many flavours: flat minimal, isometric, hand‑drawn, line‑art, detailed 3D, and so on. Grabbing a gorgeous set of neon‑glow building silhouettes for a serious financial report will clash, even if each icon is beautiful on its own. Another overlooked aspect is line weight consistency. If your set uses a 2‑px stroke, but your app’s native icons use 1.5‑px, the mismatch will subconsciously jar the user.
Practical fix: Before purchasing or downloading, look at sample images of the icon set next to your existing brand elements. Pay attention to the stroke thickness, corner rounding, and level of detail. A set that allows you to adjust stroke thickness globally inside Illustrator can save you from having to rebuild every icon. Also check whether the pack includes a consistent skyline ratio—if all buildings fit a similar height‑to‑width grid, they’ll stack beautifully in a footer or banner without awkward gaps.
5. Skipping the Proof for Print and Screen
This mistake shows its face in two scenarios. One, a small business owner designs a flyer using the high‑res JPG preview on a 300‑dpi canvas, prints it, and notices jagged edges because the JPG was never truly 300 dpi—it was a compressed preview. Two, a web designer exports a massive EPS with a complex gradient, saves it as a 1.5 MB PNG, and slows down an entire landing page. Neither outcome feels professional.
How to steer clear: For print, always work from the AI or EPS file and export to CMYK PDF with outlines. Check the resolution setting: vector art doesn’t have a native PPI, so when you export to raster, you control the sharpness. For web, use SVG wherever possible—it’s lightweight, fully scalable, and can even be styled with CSS. A city icon of a taxi or a bench can remain under 2 KB as an inline SVG. Test on a phone screen to ensure details aren’t too fine.
6. Overlooking Licensing Nuances
“Royalty‑free” doesn’t always mean “do whatever you want.” Many icon sets come with a standard license that covers commercial use, but some restrict reselling the icons as‑is, or using them in a logo that you intend to trademark. If you’re an entrepreneur building a city‑themed brand, you don’t want to discover later that you can’t buy the exclusive rights because the same skyline is on a dozen other websites. Even casual buyers should skim the license summary. It’s rarely exciting, but it saves headaches.
Sensible habit: When you find a city icons pack you love, look for phrases like “extended commercial license” or “personal use only.” If it isn’t clear, contact the creator. Most reputable marketplaces display the allowed uses right next to the download button. And if you plan to integrate the icons into a template you’ll sell, double‑check that the license covers resale in derivative works.
Getting the Most Out of Your City Icons Collection
Now that common missteps are out in the open, let’s talk about everyday situations where these icons shine—and the small touches that elevate your work.
Infographics and dashboards. City icons can anchor data about population, real estate trends, or tourism. Instead of generic clip art, a skyline building with a percentage overlay feels custom and clear. Because the layers are separated, you can isolate a single tower, colour‑code it, and even animate it in a presentation or web interactive. Just remember to keep the visual weight consistent: a chunky isometric building next to a thin outline marker will confuse the eye.
App and web symbols. An urban navigation app might use a landmark icon to represent a “points of interest” category. Here, editing becomes crucial. The original icon colour might be a warm amber, but your app palette is teal. Since the AI EPS collection lets you alter colours easily, you recolor the landmark’s base, shadow, and highlight in three clicks. You then export an SVG, check the code for unnecessary clipping paths, and you’ve got a clean, lightweight symbol that works at 24×24 pixels as neatly as at 240×240.
Print materials for events. Picture a city marathon flyer that needs route markers, water stations, and landmark silhouettes. A well‑structured icon set makes it easy to pull those symbols onto a map, scale them, and add text. If the print shop wants the file with fonts outlined and images linked, your original AI file lets you embed the icons properly. The less you rely on the JPG preview for final output, the sharper your registration table signs and banners will look under scrutiny.
What to Check Before You Commit
Whether you’re evaluating a free sampler or a premium city icons pack, a quick inspection can prevent regret. Here’s a short checklist to run through before hitting download or purchase:
- File compatibility: Does the pack include both AI and EPS for cross‑application use? Is there a read‑me about version requirements?
- Layer structure: Are elements grouped and labelled, or does every icon sit on a single anonymous layer? Download a preview if available.
- Consistency: Scan all icons in the set. Do they share the same stroke style, perspective, and level of detail, or do some look like they belong to a different family?
- Editable features: Are colours applied via global swatches? Can you easily swap a gradient or shadow without breaking the shape? A quick test in a vector programme confirms this.
- Resolution of raster alternates: If JPGs are included, note their pixel dimensions. A 1000‑px‑square JPG may not be enough for a full‑bleed poster, but it’s fine for web mock‑ups.
- Usage rights: Glance at the license. Commercial vs. personal, resale restrictions, attribution requirements. Know them early.
These steps only take a few minutes, yet they filter out sets that would otherwise create extra work. The goal is to have icons you can rely on across multiple projects, not to buy a “fixer‑upper” that you need to constantly rescue.
Integrating City Icons Without Breaking Your Workflow
One of the best bits of advice is to build a personal library of your most‑used city icons, already recoloured and exported in the formats you reach for most. For instance, after you tweak a set to match your brand, save an AI master file, an SVG folder for web, and a high‑res PNG folder for presentations. This discipline turns a one‑time editing effort into a durable resource. You’ll never again find yourself searching for a single bridge icon at the last minute.
For beginners, the idea of diving into Illustrator may feel intimidating, but the “neatly organized file and layer structure” in a good AI EPS collection is actually a gentle teacher. As you click through layers, you see how professional illustrators construct a building silhouette or a train icon. You can replicate those techniques for your own custom graphics. It’s a quiet, practical education bundled with the artwork itself.
When a JPG Is Not Your Friend
Let’s circle back to the JPG preview that’s often part of these collections Many newcomers assume that if the JPG looks sharp on screen, it’s print‑ready. But JPG compression removes fine details and adds artefacts around straight edges—exactly the kind of edges that city icons depend on. If you must use a raster version, always export a fresh PNG from the vector source at the exact dimensions and resolution you need. You’ll get clean transparency and sharp lines. That single habit can save you from the blurry-building letdown that plagues so many homemade flyers.
Similarly, changing colours on a JPG in Photoshop means painstaking selections and colour range adjustments, often with messy halos. With the AI or EPS file, you select a shape, apply a new fill, and you’re done. That speed becomes invaluable when a client says, “Can we make all the landmarks navy instead of slate?”
Small Details That Build Credibility
The final piece of the puzzle is consistency in detail. When a set is described as having “perfection in details,” it often refers to properly aligned anchor points, symmetrical curves, and uniform gap spacing. These aren’t just buzzwords—they affect how professional your finished project feels. A logo with a slight bump on a building roof or a signpost that’s one pixel off‑centre can subtly undermine trust. Before finalising any design, zoom in. Check the corners, the intersections, and the thin lines. If you find irregularities, the beauty of vector art is that you can fix them yourself with a few node adjustments.
City icons are far more than decorative flourishes. They communicate place, purpose, and personality. Whether you’re mapping a smart‑city initiative, designing an event poster, or illustrating a travel guide, the right icon set helps you speak clearly. The wrong one, or the right one used carelessly, creates unnecessary friction. Take the time to understand the files you’re working with, respect the difference between vector and raster, and always tailor the artwork to the medium. When you do, those small skyline graphics will do the heavy lifting your project deserves.